How to design a scalable data model for a personalized workout tracking app
How to design a scalable data model for a personalized workout tracking app James Virgo Samuel Virgo Ahmad Taleb Every app is built around data.
You do not need to know how to code in order to build an app in 2023.
Nowadays there are plenty of low-code / no-code, hybrid no-code & generative AI solutions that can be used to build an app without coding. However, just because you can build an app without coding does not guarantee success.
In this article we are going to look at how you can build a successful app without coding. We will cover:
Below are some of the some of the most popular no-code app builders:
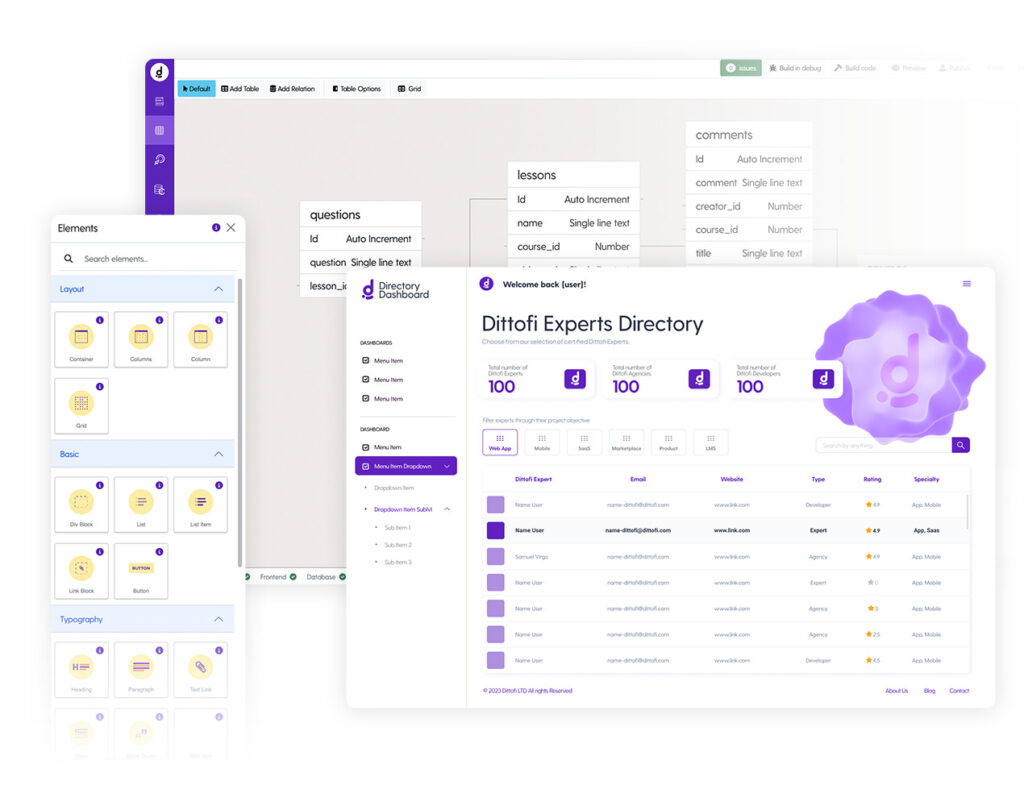
No-code app builders are online applications that allow you to build mobile & web apps visually & without writing any code.
There are two types of no-code platform.
Most no-code platforms divide app development into four parts:
Some no-code platforms support the development of all of these components. These are known as full stack no-code platforms. Other no-code platforms support just one aspect of the development process e.g. frontend only or backend only no-code tools.
When choosing a no-code or hybrid no-code app builder, there are several factors to consider:
(1) Allow you to scale your app in the most cost effective way. This will positively impact your app’s profit margins.
(2) The code & Intellectual Property ownership can positively impact the value of your business – this is because you’re developing an asset that you actually own, that can be a differentiator to your competition & that you can take in any direction needed.
(3) Code ownership means that you can host your own app anywhere. This is of critical importance as you scale – especially when you consider that you’ll need to comply with multi-jurisdictional data security laws.
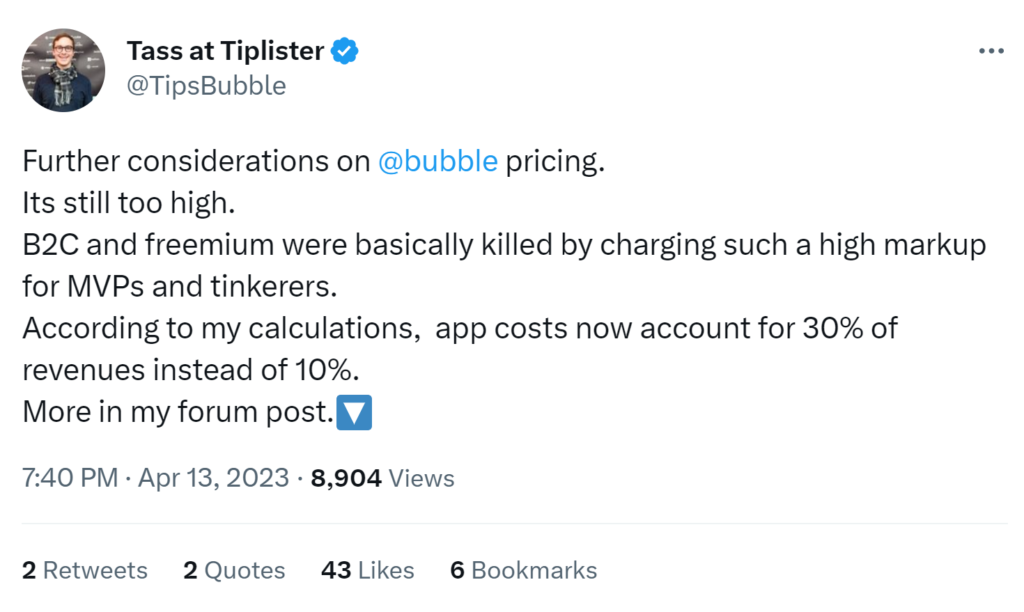
(4) Code ownership means no risk of vendor lock-in. Vendor lock-in means that you can potentially be forced to pay a higher price for an inferior bit of software. No-code platforms regularly change their pricing & this can make running your app cost prohibitive, as happened in 2023 with Bubble (see the screenshot below).
Building an app is a journey one that will be exciting, fun & challenging. Selecting the correct tool is just one part of the journey. In this section, we give you some tips to building an app without coding.
Before you start developing an app without coding, you need to first decide on how you want to manage your software development lifecycle (SDLC). There are six main stages to the SDLC. These are:
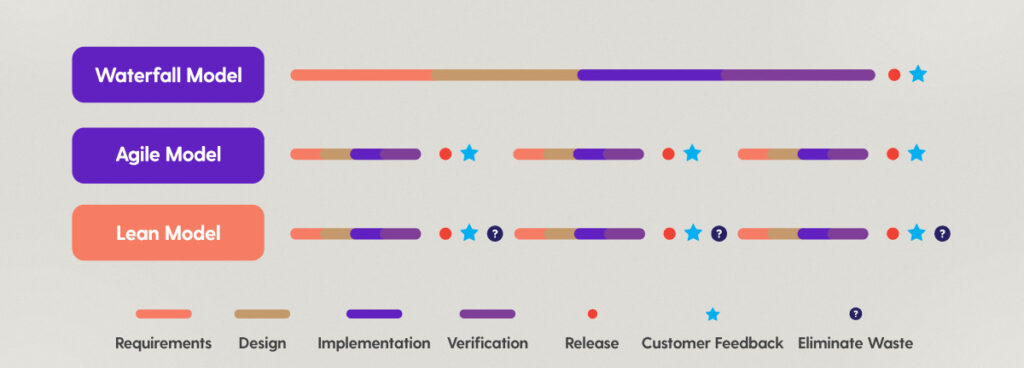
In the traditional model for software development, teams organized these tasks into something called a waterfall model. With the waterfall model, every stage of the SDLC happens in one go. This means you’ll essentially release one version of your software after a 12 month period & then (only after 12 months) will you gather customer feedback. In contrast, modern models such as agile & lean models promote more frequent releases to their customers so that app creators can iterate faster & improve customer adoption.
The diagram below shows the difference between the three models. Notice that in the case of agile & lean models, there are three releases that are made to customers vs the waterfall method that gives customers visibility of the product just once in the entire development cycle.
After you’ve chosen a SDLC model, your next step is to gather the requirements for your app.
To do this, sit down & write a list of features that you want to include in your app. You can write this down in a bullet point list. This will include standard features such as login, sign up, password recovery & more app specific features. If you’re taking a lean or agile approach to software development, you will be planning to make multiple releases of your app. Therefore, once you’ve written up your list, decide which features you want to include in version 1 of your app.
To help decide which features to include in version 1, you can remember that version 1 should include the minimum number of features to get the maximum amount of validated learnings. A validated learning is simply what you want to prove with the release of your app.
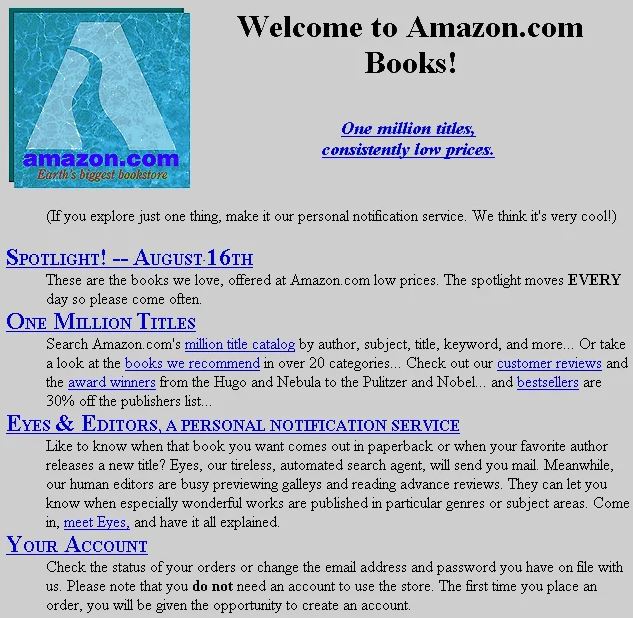
A great example of this approach to app development was demonstrated by Jeff Bezos when he founded Amazon. At the time it was not clear if the general public would buy products online. Therefore, Jeff wanted to prove that users would in fact buy products off the internet. Therefore, for version 1 of his app, he built a basic website where users could look search for books & purchase books. He chose books because they were easy to package, low cost & hand a high amount of demand. At this point he had zero inventory & would actually drive to book stores to collect up the books when people bought them. Once Jeff had validated that people would buy books online, he then moved to version 2 of his app. This is a perfect example of a lean approach to software development.
SMEs & enterprises can also think of their app development in terms of validated learnings. Your users in this case are simply your existing customer base or your internal employees. Working in short release cycles improves the likelihood that the app will be adopted & solve the problems that you’re looking to fix.
Once you have your list of features bullet pointed out, the next step is to design your app.
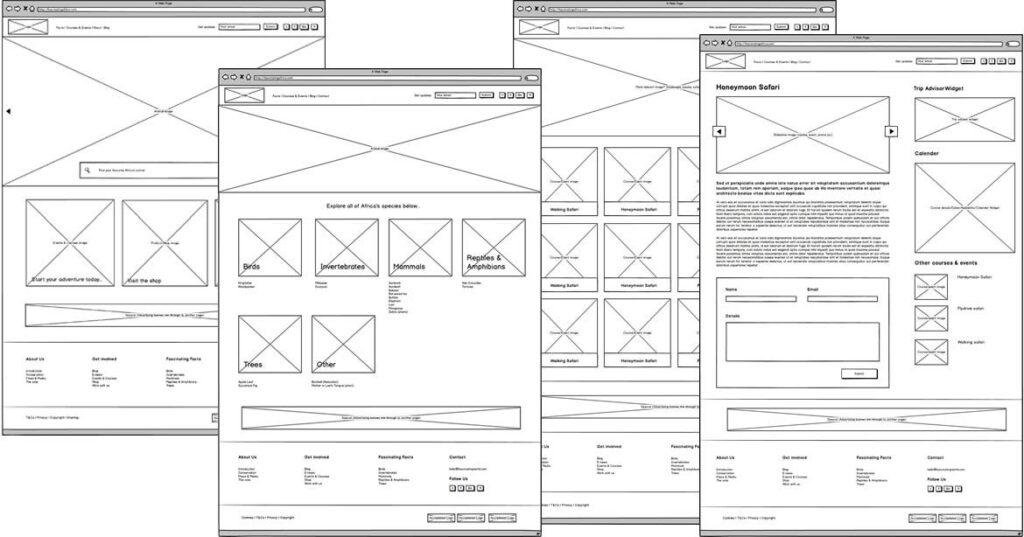
For this you can take a bit of paper & draw out the initial screens for your app & think about what information you will display on each screen & how users will transition between screens. This can be super rough, since it is highly likely that you will adjust these designs based on your customer feedback. An example of low fidelity wireframes is set out below.
Once you have these screens set out, the next step is to start implementing your designs directly inside of the no-code platform.
You do not need to create a high fidelity Figma wireframe before starting your app development. This might seem like a good idea, however version 1 of your app is going to continually change. Therefore, it’s a more cost effective approach to start from a template app design that looks professional & that you can customize for your particular use case. To do this, most no-code platforms have template apps & component libraries that you can use as a starting point.
Alternatively, if you are using a hybrid no-code tool these can be taken from a range of popular template marketplaces such as ThemeForest, Creative Market, Template Monster etc. Templates on these sites use professionally developed code that you can import into your app. You can then customize the templates using the visual no-code editor.
You then need to start learning the no-code / hybrid no-code app builder that you choose.
A good tip to get started with any no-code app builder is to create two apps: (1) your main app & (2) a training app. If you get stuck on your main app, you can then switch back over to your training app. In Dittofi, we give all new users a free training app & a free video training series when they sign up. If you’re interested in giving this a shot, you can check this out on our 14 day free trial.
Okay – so now is the time to pick a no-code tools & to start learning the no-code app builder of choice. A good tip to get started with any no-code app builder is to create two apps: (1) your main app & (2) a training app. If you get stuck on your main app, you can then switch back over to your training app. In Dittofi, we give all new users a free training app & a free video training series when they sign up. If you’re interested in giving this a shot, you can check this out on our 14 day free trial.
Many no-code & hybrid no-code platforms also run programs to help you build & launch version one of your app. At Dittofi, we run an App Launch Program where we help you to build & launch version 1 of your app in just 10 hours. This can help you quickly & easily test if the app you want to build has legs & can acquire users.
Now that your app is live two things will happen:
In the first case, you can now experiment by adding new features that have been requested by your clients & repeat the development process. Write out a list of the requirements that you want to implement, design them & then implement, test & release.
In the worst case where no one wants to sign up to your app you can either (A) add more features that you think will help get people onto your app or (B) pivot your idea & try building something slightly or totally different.
I hope that this was a helpful article that explains how you can go about building an app without coding. The article is intended for companies that want to build version 1 of their apps. The same concepts can be applied to companies of all sizes however, more mature companies will have a better idea of the features that they should include in version 1 of their software.
If you would like to experiment building an app without coding, you can check out Dittofi. We run a 14 day free trial. You can start with a template app, or import templates into the system. Alternatively, we are avaliable if you’d like to speak with one of our app consultants to get advice on the best way to approach your first no-code / hybrid no-code app build.
How to design a scalable data model for a personalized workout tracking app
How to design a scalable data model for a personalized workout tracking app James Virgo Samuel Virgo Ahmad Taleb Every app is built around data.

How to build a Learning Management System (LMS) in React & Golang in minutes
How to build a Learning Management System (LMS) in React & Golang in minutes By James Virgo A custom Learning Management System (LMS) enables you

How to successfully design, build and launch an MVP
How To Successfully Design, Build & Launch An MVP By James Virgo In this article we are going to take a look at what

⸺ Receive the latest news
Get notified about new articles and events